
Screen overview
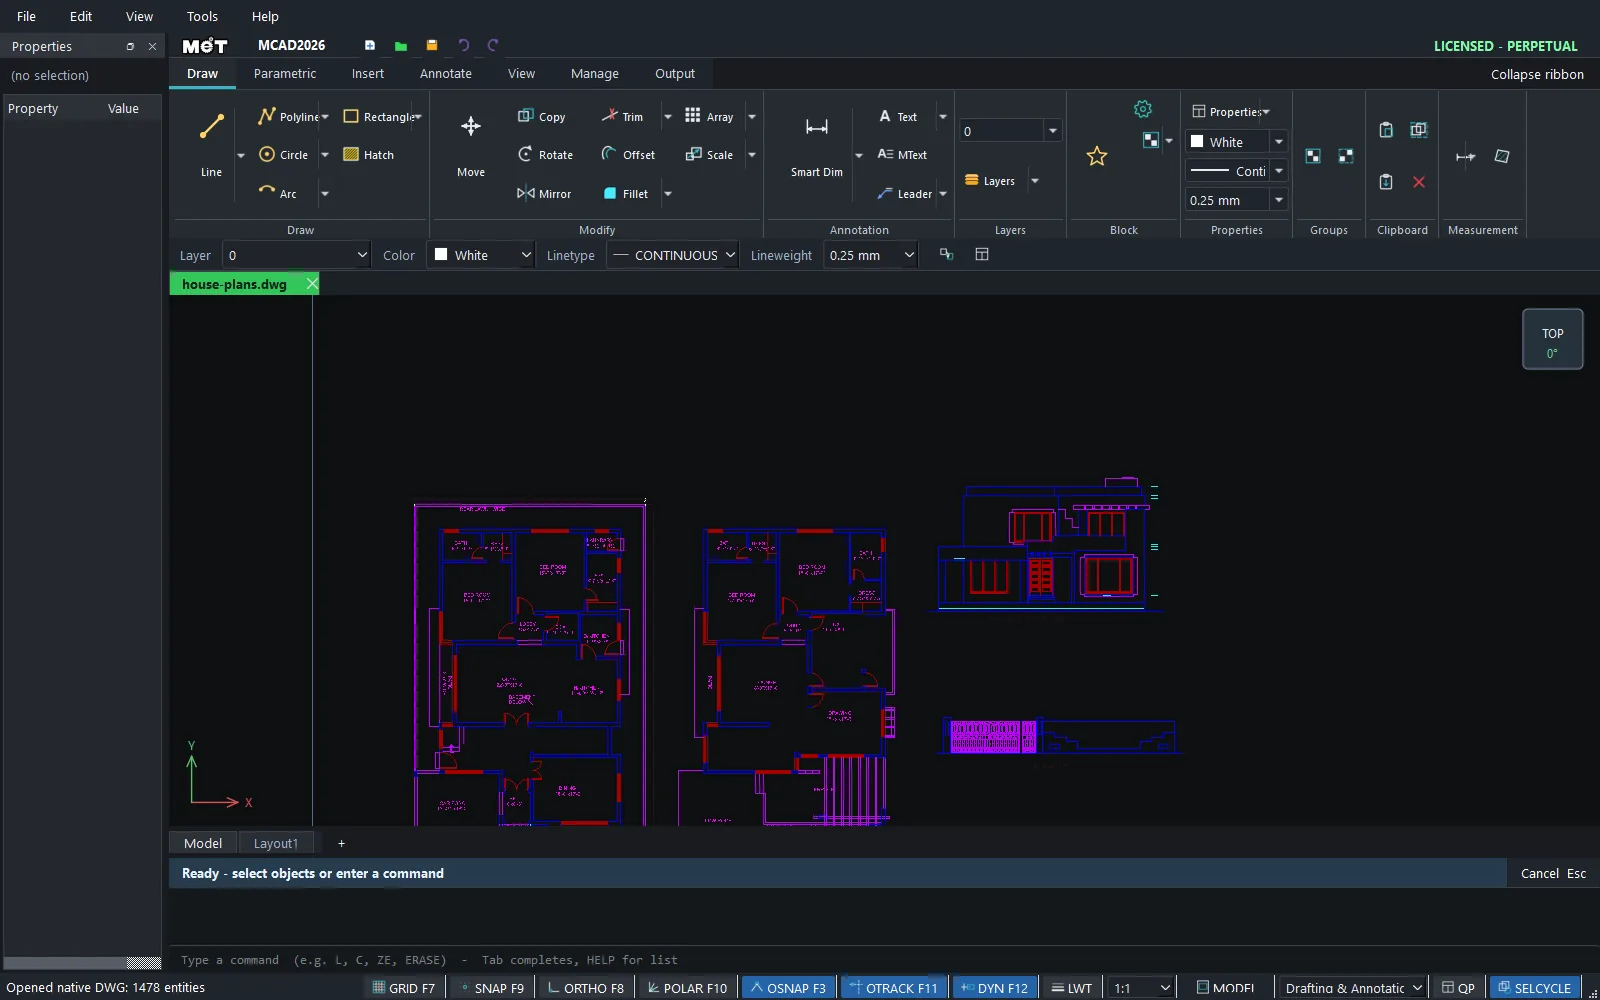
| Part | Location | Purpose |
|---|---|---|
| Menu bar | Top | File, Edit, View, Tools, Help |
| Quick Access Toolbar | Next to the MET logo | New, Open, Save, Undo, Redo |
| Ribbon | Below the menu | The Draw, Parametric, Insert, Annotate, View, Manage and Output tabs. See Ribbon and menus. |
| Licence status | Top right | For example LICENSED - PERPETUAL |
| Quick Properties bar | Below the Ribbon | Layer, Color, Linetype and Lineweight for new objects or the selected objects |
| File tabs | Above the drawing area | One tab per file (* = not saved yet) |
| Drawing area (canvas) | Centre of the screen | Draw and edit here. It has the X/Y axis icon and the ViewCube (TOP). |
| Model / Layout tabs | Below the drawing area | Switch between model space and the paper layout |
| Prompt bar | Below the Layout tabs | Shows the next step of the command. It has a Cancel Esc button. |
| Command line | Below the prompt bar | The last 3 lines of command history and the box where you type commands |
| Status bar | Bottom | Cursor coordinates, selection count, the GRID/SNAP/ORTHO/POLAR/OSNAP/OTRACK/DYN/LWT buttons, Annotation scale, Workspace |
| Properties palette | Left | The properties of the selected objects |
| Content Browser | Right | The block and symbol libraries. See Symbol Library. |
Using the mouse
| Action | Result |
|---|---|
| Left-click | Select an object / specify a point. |
| Drag left to right | Window selection (selects only objects that lie entirely inside the box). |
| Drag right to left | Crossing selection (selects objects that cross the box). |
| Roll the mouse wheel | Zoom in or out around the cursor position. |
| Hold the wheel and drag | Pan. |
| Right-click | The context menu. See Clipboard. |
| Double-click text | Edit the text in place. |
Try it: Draw a doormat and watch the screen respond
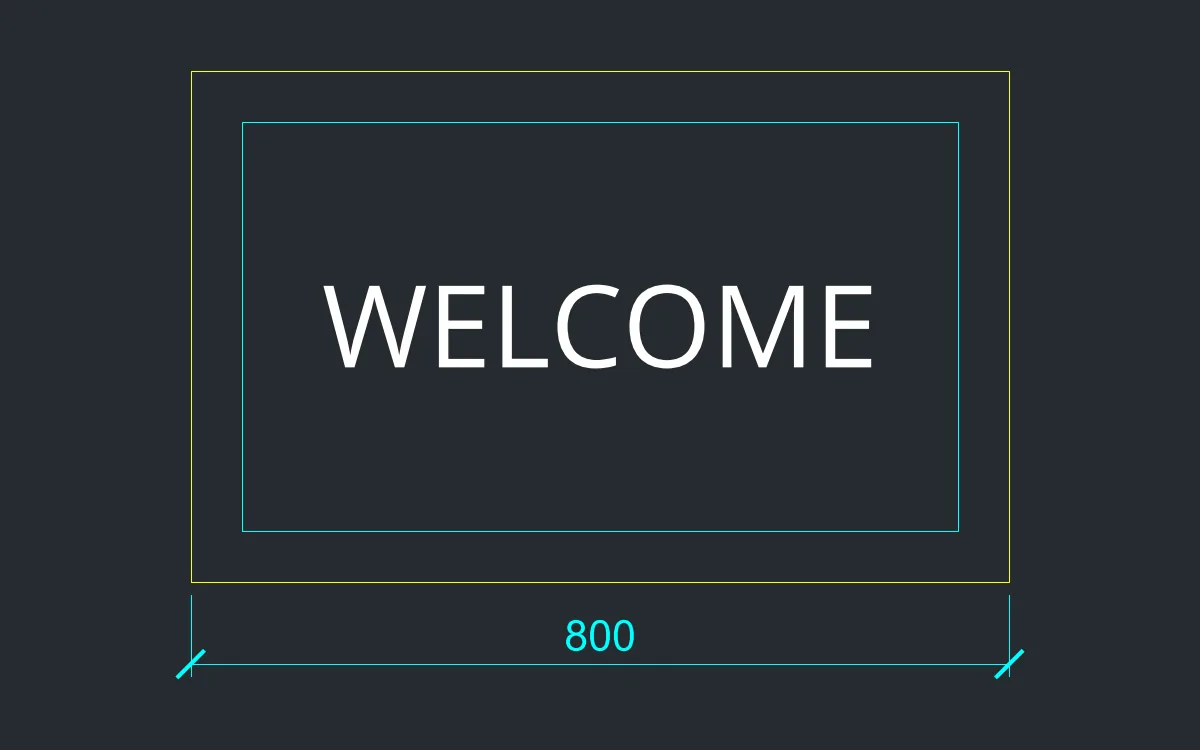
The quickest way to learn the screen is to draw something small and watch what each part tells you. Try an 800 x 500 mm doormat.
- Move the mouse in the drawing area. The X/Y coordinates on the left of the Status bar follow it.
- Type
REC. The Prompt bar tells you the next step. Type0,0Enter, then800Tab500Enter. The file tab at the top now shows*, meaning not saved yet. - Inner border:
REC50,50, then700Tab400. - Click the outer rectangle. The Properties palette on the left shows Area
400000and Perimeter2600under Measured. - While it is selected, change its colour on the Quick Properties bar below the Ribbon, then roll the mouse wheel to zoom in.
Challenge: Drag a crossing window from right to left over the inner border and read the selection count on the Status bar.