
What it does
NEST places the closed shapes in your drawing onto raw material sheets so that as little material as possible is wasted. It then exports one DXF per sheet, a CSV report, or passes the result on to G-Code.
Where to find it
- Ribbon: Output › Interchange › Nest
- Command line:
NEST(AliasNESTING,SHEETNEST)
Steps
- Draw the parts as closed shapes (open shapes are not counted).
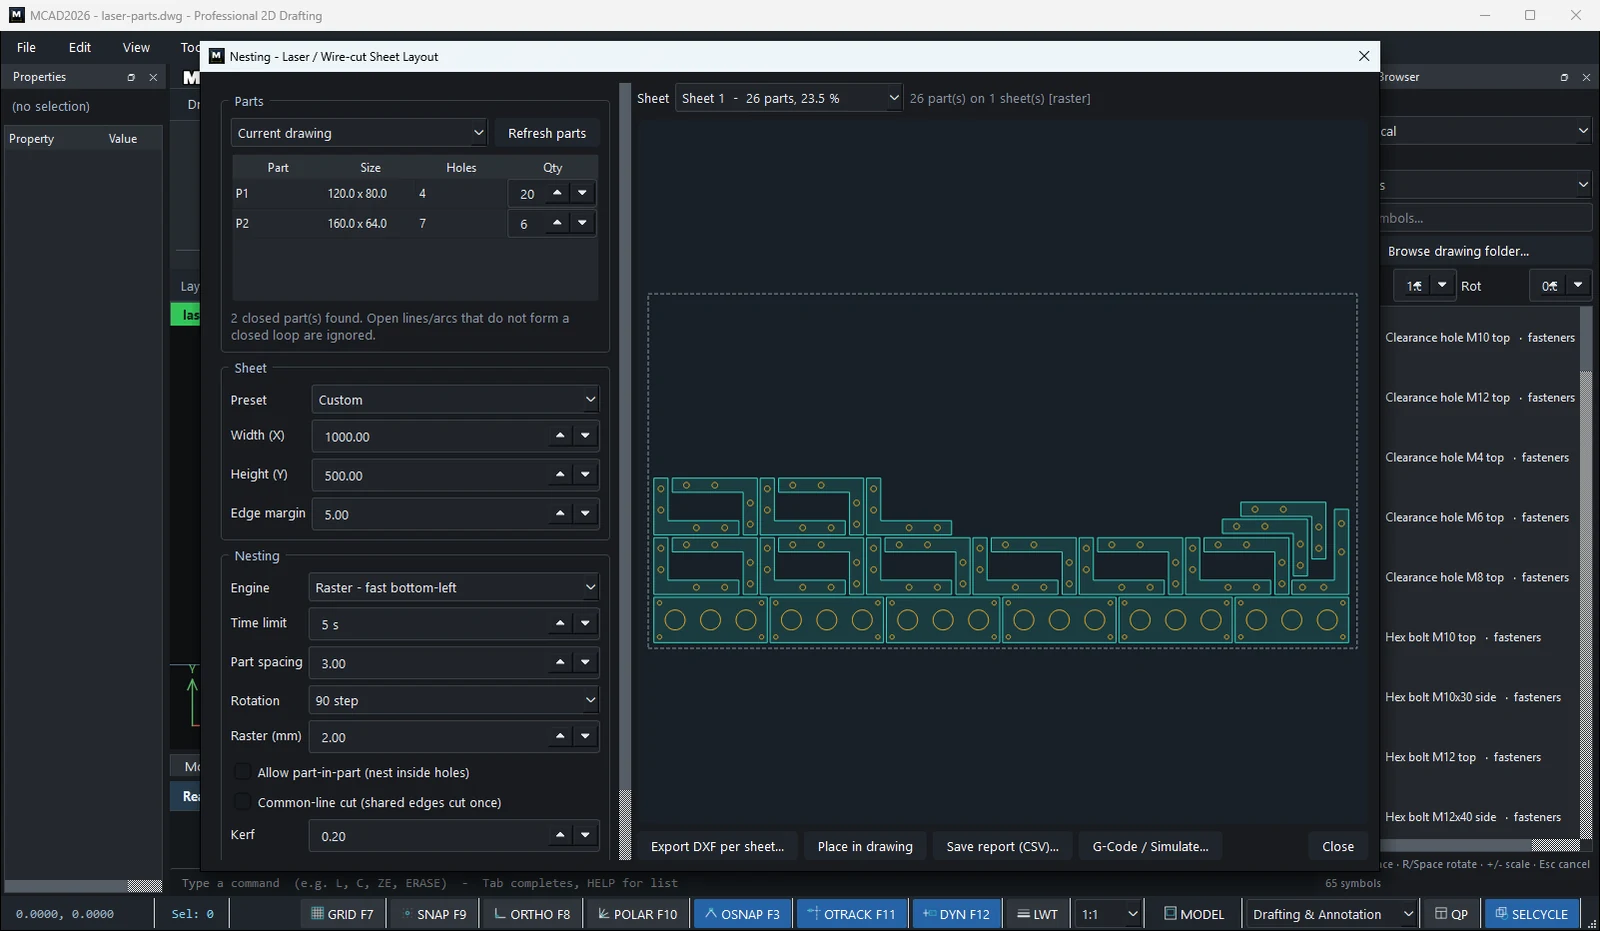
- Click Output › Nest and check the Parts list (you can edit the quantity of each part).
- Choose a Sheet › Preset, or set Width/Height/Edge margin.
- Set the Nesting options (Engine, Time limit, Part spacing, Rotation, Kerf).
- Click Nest and review each sheet.
- Export with Export DXF per sheet..., Place in drawing, Save report (CSV)..., or G-Code / Simulate...
Options
| Option | Meaning |
|---|---|
| Parts | Current drawing / Selected entities / Visible entities, Refresh parts |
| Preset | 1220 x 2440 (4 x 8 ft), 1250 x 2500, 1500 x 3000, 1000 x 2000, Custom |
| Edge margin | Margin around the sheet edge |
| Engine | Auto, Sparrow (true-shape optimiser), Raster (fast, packs toward the lower left) |
| Time limit | Maximum calculation time |
| Part spacing | Distance between parts |
| Rotation | Fixed (0), 0/180, 90 step, 45 step, 30 step, 15 step |
| Allow part-in-part | Place small parts inside the holes of larger parts |
| Common-line cut | Cut shared edges once |
| Kerf | Width of the cut |
| Write part labels | Write part names on Layer LABELS |
Try it: L-brackets and gland plates on one sheet
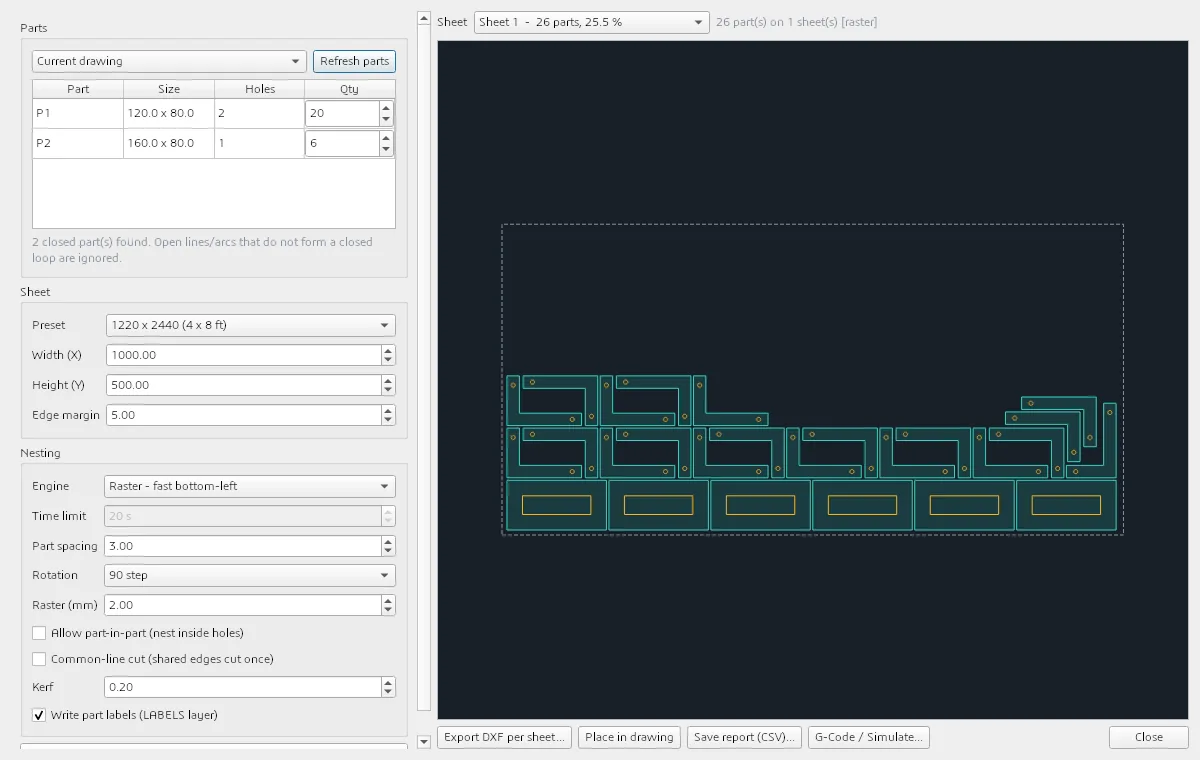
A batch for an enclosure job: 20 L-shaped mounting brackets and 6 gland plates, laser-cut from a 1000 x 500 offcut. NEST works out the layout and tells you how much of the sheet you use.
- Bracket: Polyline - Closed Loop through
0,0120,0120,2020,2020,800,80, then Enter. HolesC10,65andC105,10, both radius3.25. - Gland plate:
REC200,0→160Tab80with the cut-outREC225,25→110Tab30. - Output › Interchange › Nest. The Parts list shows P1
120.0 x 80.0with 2 holes and P2160.0 x 80.0with 1 hole. Set Qty20for P1 and6for P2. - Sheet: Width
1000, Height500, Edge margin5. - Nesting: Engine
Raster - fast bottom-left, Rotation90 step, Part spacing3. Click Nest. - The result line reads
26 part(s) on 1 sheet(s). Use Export DXF per sheet... for the laser, or G-Code / Simulate... to go straight on.
Challenge: Tick Allow part-in-part and add a small part that fits inside the gland plate cut-out, then nest again and compare the utilisation.