
What it does
The Status bar at the bottom of the window shows the cursor coordinates, the number of selected objects, and buttons that turn drafting aids on and off. A blue button means the aid is on.

Status bar buttons
| Button | Shortcut | Equivalent command | Meaning |
|---|---|---|---|
| GRID | F7 |
– | Shows the Grid |
| SNAP | F9 |
SNAP |
Grid Snap: the cursor jumps by the Grid spacing |
| ORTHO | F8 |
ORTHO |
Forces horizontal/vertical lines |
| POLAR | F10 |
POLAR |
Polar tracking at the set angles (default 45°) |
| OSNAP | F3 |
OSNAP |
Object Snap: snaps to End, Mid, Center, Quadrant, Intersection, Nearest, and more |
| OTRACK | F11 |
– | Object Snap Tracking: draws tracking lines from snap points |
| DYN | F12 |
– | Smart Input at the cursor |
| LWT | – | – | Shows line weights |
| 1:1 ▾ | – | – | Annotation scale. See Annotation Scale |
| MODEL | – | – | Switches between Model / Layout |
| Drafting & Annotation ▾ | – | WSCURRENT |
Workspace. See Workspaces |
| QP | Ctrl+Shift+P |
QPMODE |
Quick Properties at the cursor |
| SELCYCLE | – | – | Click again at the same spot to cycle through overlapping objects |
Related commands
| Command | Alias | Format | Meaning |
|---|---|---|---|
| SNAP | SN |
SNAP <distance|ON|OFF> |
Sets the Grid Snap spacing (entering a number also turns Snap on) |
| OSNAP | OS, DDOSNAP |
OSNAP <ON|OFF> |
Turns Object Snap on/off |
| ORTHO | – | ORTHO <ON|OFF> |
Turns Ortho on/off |
| POLAR | – | POLAR <ON|OFF> |
Turns Polar tracking on/off (turning Polar on turns Ortho off) |
| APERTURE | – | APERTURE <1-50> |
Size of the Object Snap target (pixels) |
| PICKBOX | PICKBOXSIZE |
PICKBOX <1-50> |
Size of the object selection box (pixels) |
| OSMODE | – | OSMODE <value> |
Object Snap set as a bitmask (same as AutoCAD) |
| DSETTINGS | SE2, DDRMODES |
– | Drafting Settings window: Grid/Snap spacing, followed by the Object snap aperture |
| ISOPLANE | ISO |
ISOPLANE <Left|Top|Right|OFF> |
Isometric drafting: sets Polar to the 30° axes of the selected plane |
| DIMSNAP | – | DIMSNAP [ON|OFF] |
Lets Smart Dimension snap to End/Mid/Center at close range (OFF = measure objects only) |
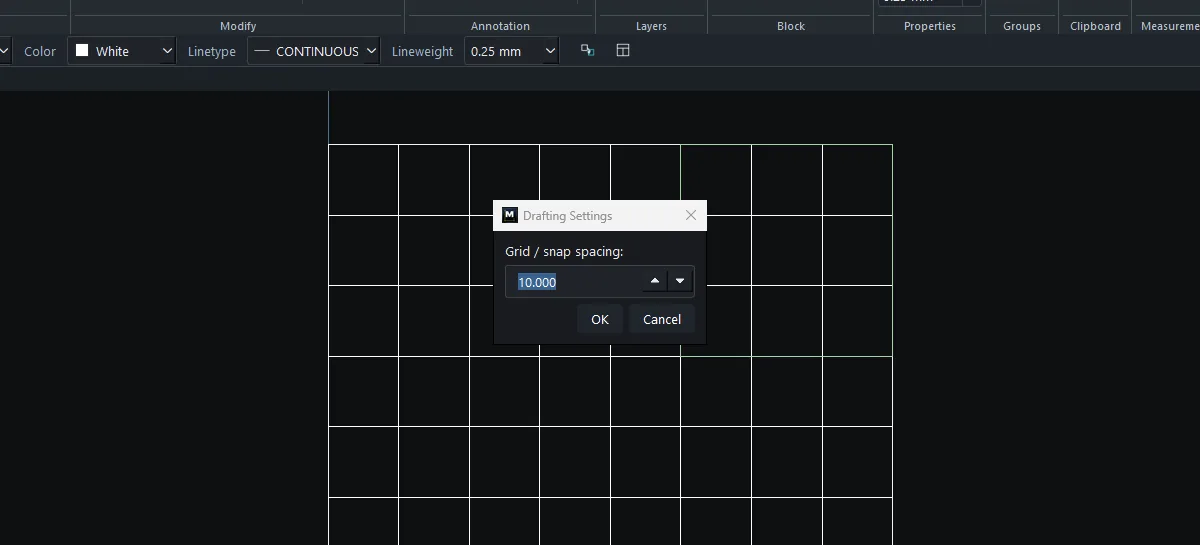
Steps: set a 5 mm Grid Snap
- Type
SNAP 5and press Enter (or open Manage › Customization › Drafting Settings and enter5). - Press
F7to show the Grid. - Start drawing. The cursor jumps every 5 mm. Press
F9to turn it off.
Note:
ISOPLANEdoes not tilt the grid. The drawing is still true 2D. The 30° Polar angles make the drawing look isometric.ISOPLANE OFFrestores the 45° Polar angles.
Try it: Bathroom floor on a 300 mm tile grid
Set Grid Snap to the tile size and the cursor jumps one tile at a time. Draw a 2.4 x 1.8 m bathroom and a 900 x 900 shower tray without typing a single number.
- Type
SNAP 300, press Enter, then pressF7to show the Grid. - Press
F8to turn on ORTHO so lines stay horizontal or vertical. PL, then click along the grid:0,0→2400,0→2400,1800→0,1800→0,0(watch the Status bar coordinates as you click), then Enter.- Shower tray:
REC, click1500,900, then click2400,1800(3 x 3 tiles). - Press
F9to turn Snap off when you draw fixtures that do not sit on the grid.
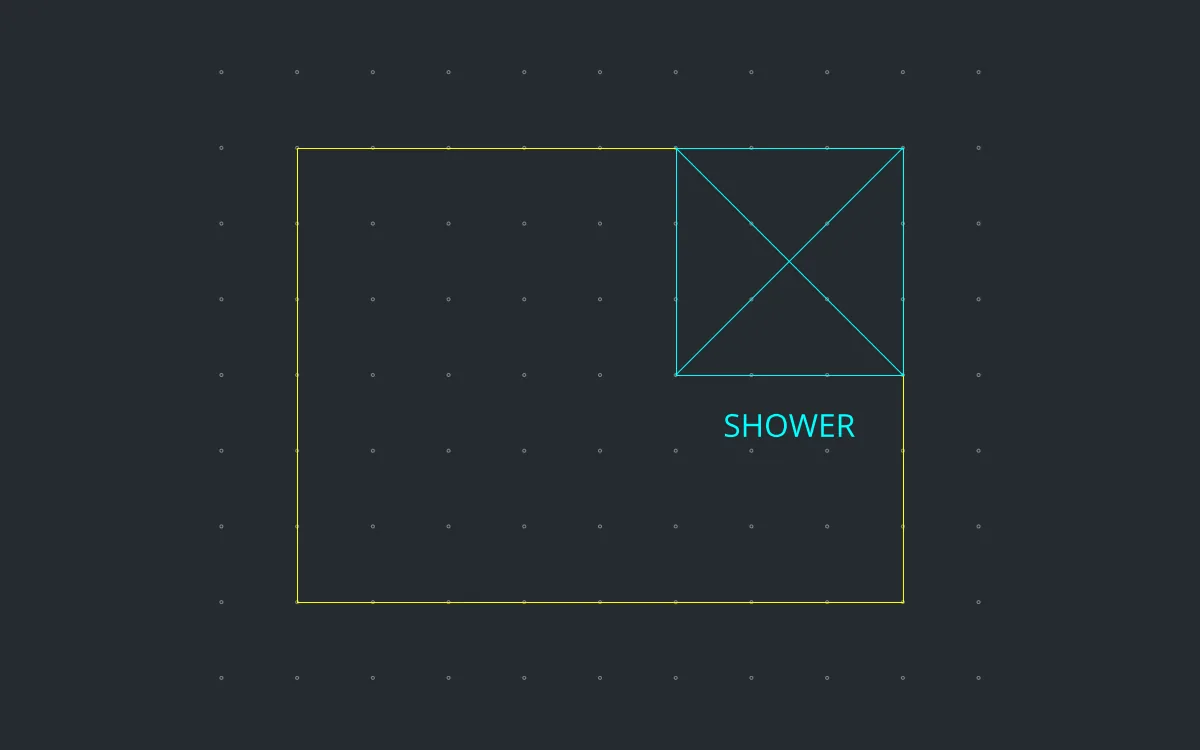
Challenge: Type ISOPLANE Top and sketch the shower tray as an isometric view with 30° Polar, then ISOPLANE OFF.