
What it does
QDIM creates several dimensions at once from the selected objects.
| Command | Alias | Meaning |
|---|---|---|
| QDIM | – | QDIM [C|S|B|O|R|D] |
| DIMCONTINUE | DCO |
Same as QDIM C (continuous) |
| DIMBASELINE | DBA |
Same as QDIM B (baseline) |
| Option | Meaning |
|---|---|
| C | Continuous: dimensions chained end to end (default) |
| S | Staggered |
| B | Baseline: all dimensions measured from the same base |
| O | Ordinate |
| R | Radius for every selected circle |
| D | Diameter for every selected circle |
Where to find it
- Ribbon: Annotate › Dimensions › Quick Dim
- Command line:
QDIM
Steps
- Select the lines or objects you want to dimension.
- Type
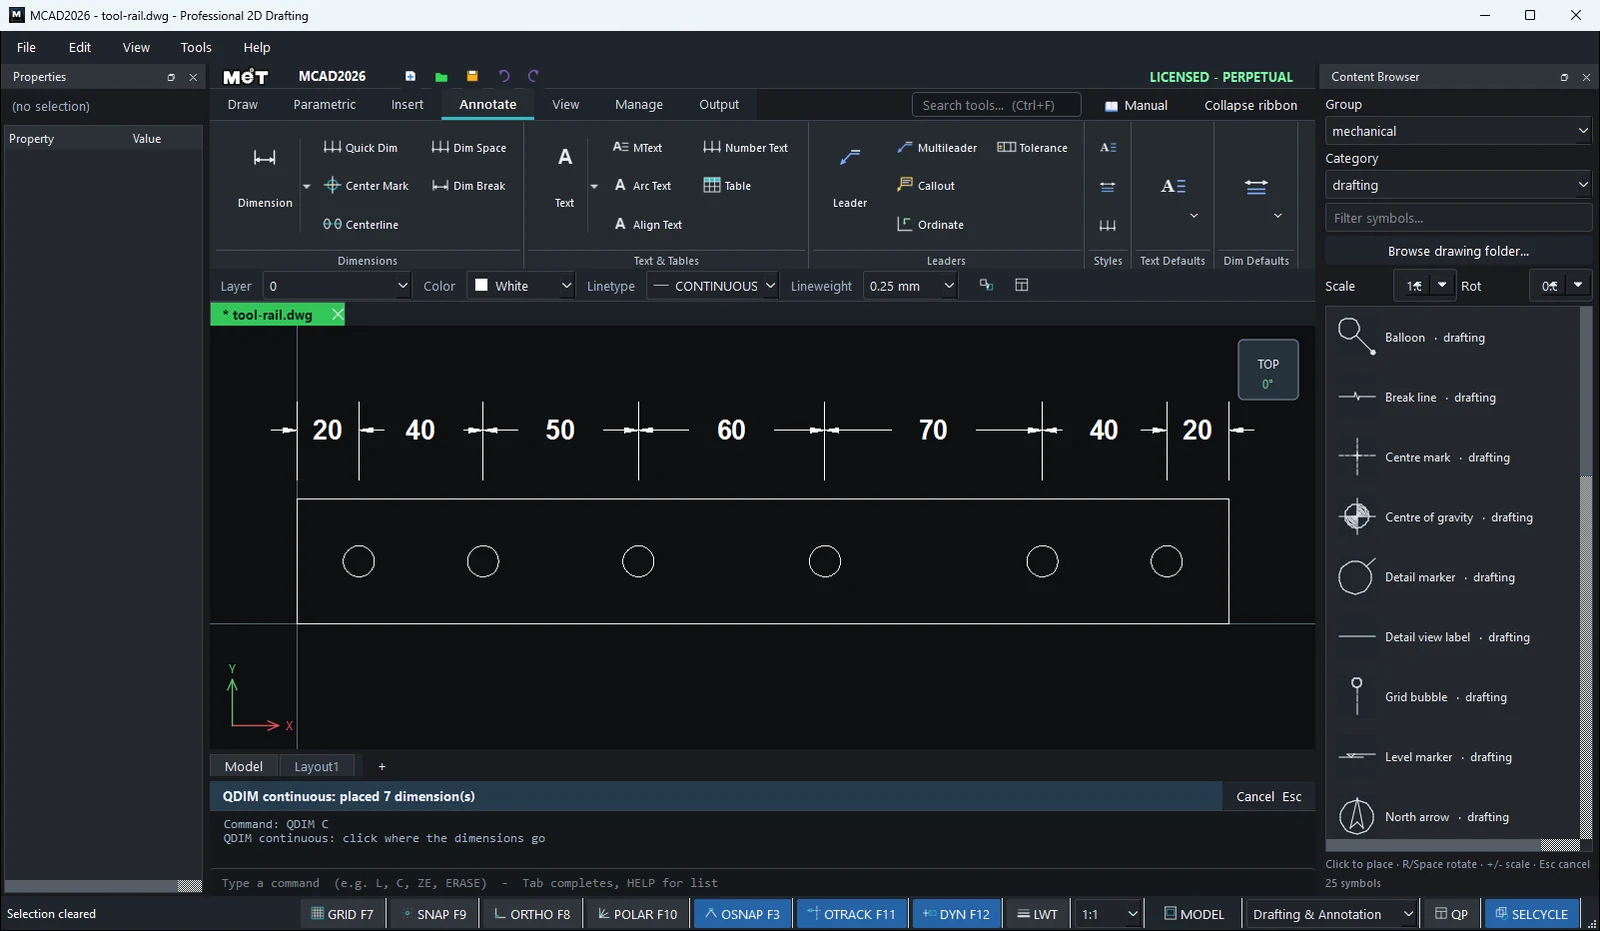
QDIM C(orDCO) and press Enter. QDIM continuous: click the side where the dimensions goClick the side where you want to place them.
Try it: Pegboard tool strip
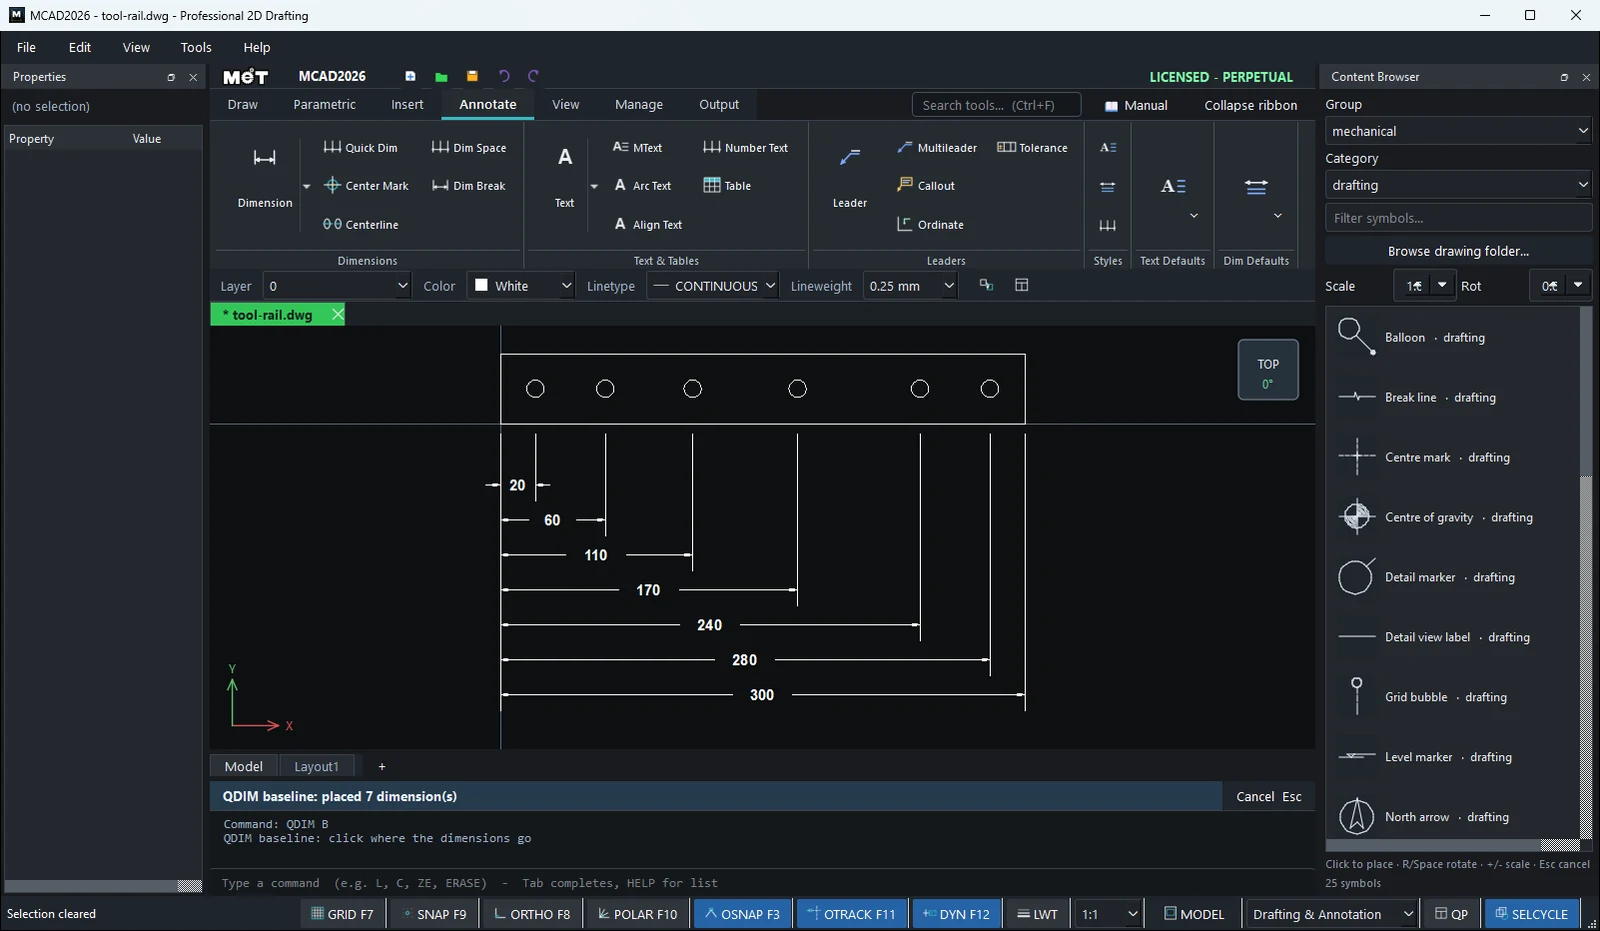
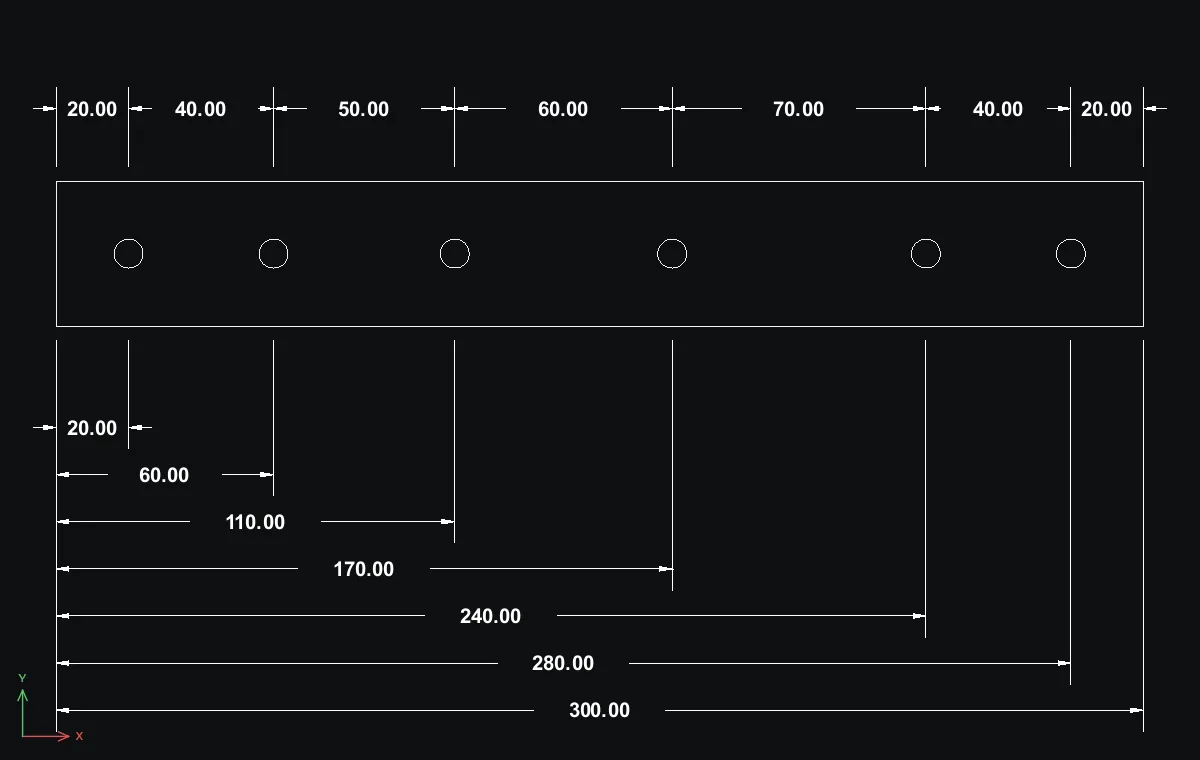
A 300 x 40 steel strip for hanging tools on the workshop wall, with six Ø8 holes at uneven spacing (big spanners need more room). QDIM dimensions the whole row twice: once as a chain, once from a single base.
- On Annotate › Dim Defaults, set Dim H
6.5and Arrow3.5so the numbers suit a part this size. REC0,0→300Tab40.- Holes:
Cradius4at20,20,60,20,110,20,170,20,240,20and280,20. - Drag a window around the strip so the strip and all six holes are selected.
- Type
QDIM Cand click above the strip. One click places the chain 20, 40, 50, 60, 70, 40, 20. - Select everything again, type
QDIM Band click below the strip. Every hole is now measured from the left end: 20, 60, 110 ... 300.
Challenge: Try QDIM S (staggered) on the same selection, then even out the baseline stack with DIMSPACE.