
What it does
The Layer Manager lists every layer in the drawing and controls how each layer is displayed and edited.
Where to find it
- Ribbon: Draw › Layers › Layers (the submenu has the full set of LAY* commands) or Manage › CAD Standards › Layers
- Command line:
LAYER(aliasLA) - The Layer box on the Ribbon (Layers group) and the Properties bar below the Ribbon set the current layer.
- Menu: View › Layers Palette
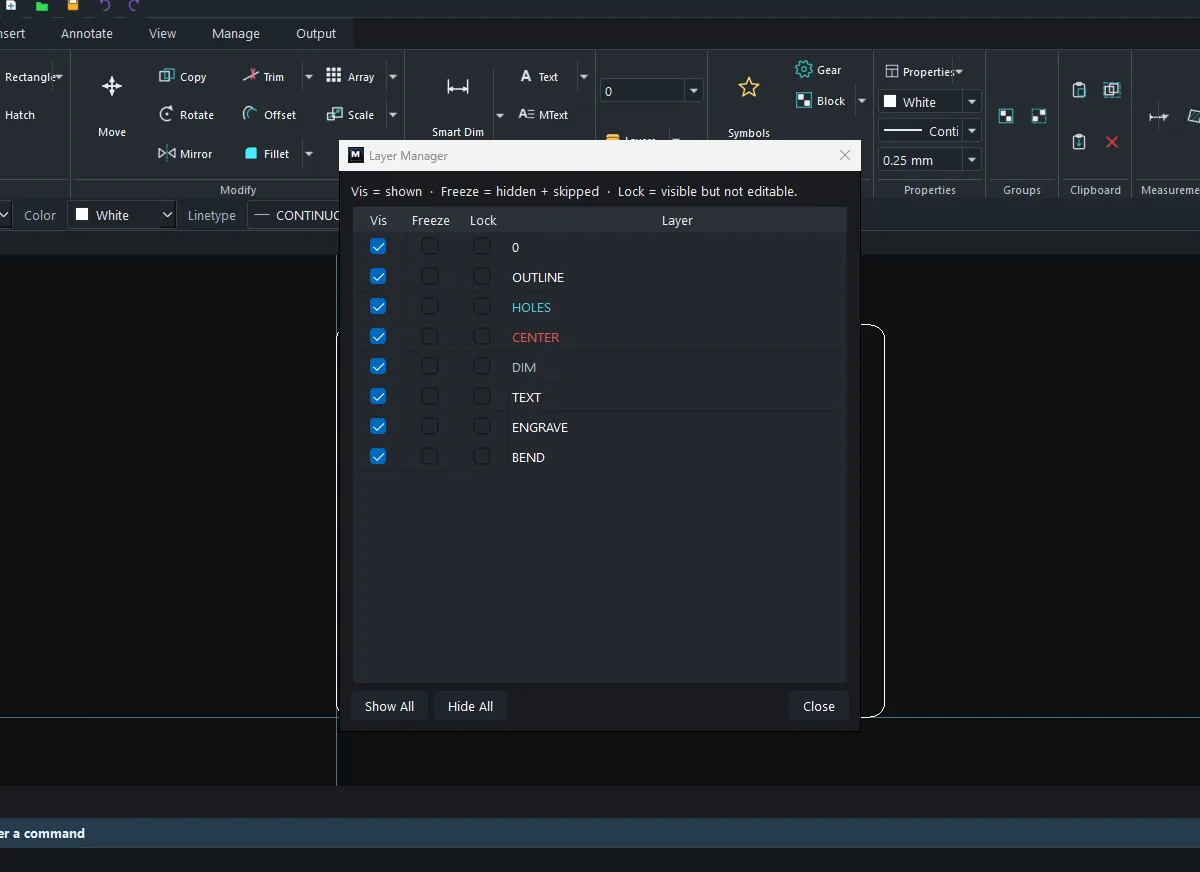
Options
| Option | Meaning |
|---|---|
| Vis | Show (ticked) / hide. |
| Freeze | Hides the layer and skips it in processing. LAYON does not turn it back on. You must thaw it. |
| Lock | The layer is visible, but you cannot select or edit its objects. |
| Layer | The layer name. |
| Show All / Hide All | Shows / hides every layer. |
| Close | Closes the window. |
Set the current layer
- Choose from the Layer box on the Ribbon. New objects go on that layer.
- Or click an object and type
LAYMCUR(makes the object's layer current).
Create a new layer
A new layer is created when you give an object a layer name:
- Select the objects.
- Type
CHPROP layer=HOLESand press Enter. - Click that object and type
LAYMCURto make HOLES the current layer.
Note: All layers in an opened DWG/DXF file appear automatically in the Layer Manager and in the Layer box.
Layer-related commands
| Command | Alias | Syntax | Meaning |
|---|---|---|---|
| RENAME | REN |
RENAME <old name> <new name> |
Renames a layer and moves all its objects. |
| LAYERSTATE | LAS, LMAN |
LAYERSTATE <Save|Restore|List|Delete> [name] |
Saves or restores the Off/Freeze/Lock state of every layer. |
Steps: save a layer state for drawing review
- Turn off or freeze the layers you do not want to see.
- Type
LAYERSTATE SAVE review. - Later, type
LAYERSTATE RESTORE reviewto bring back the state of every layer.
Try it: Pocket checkers board with CUT and ENGRAVE layers
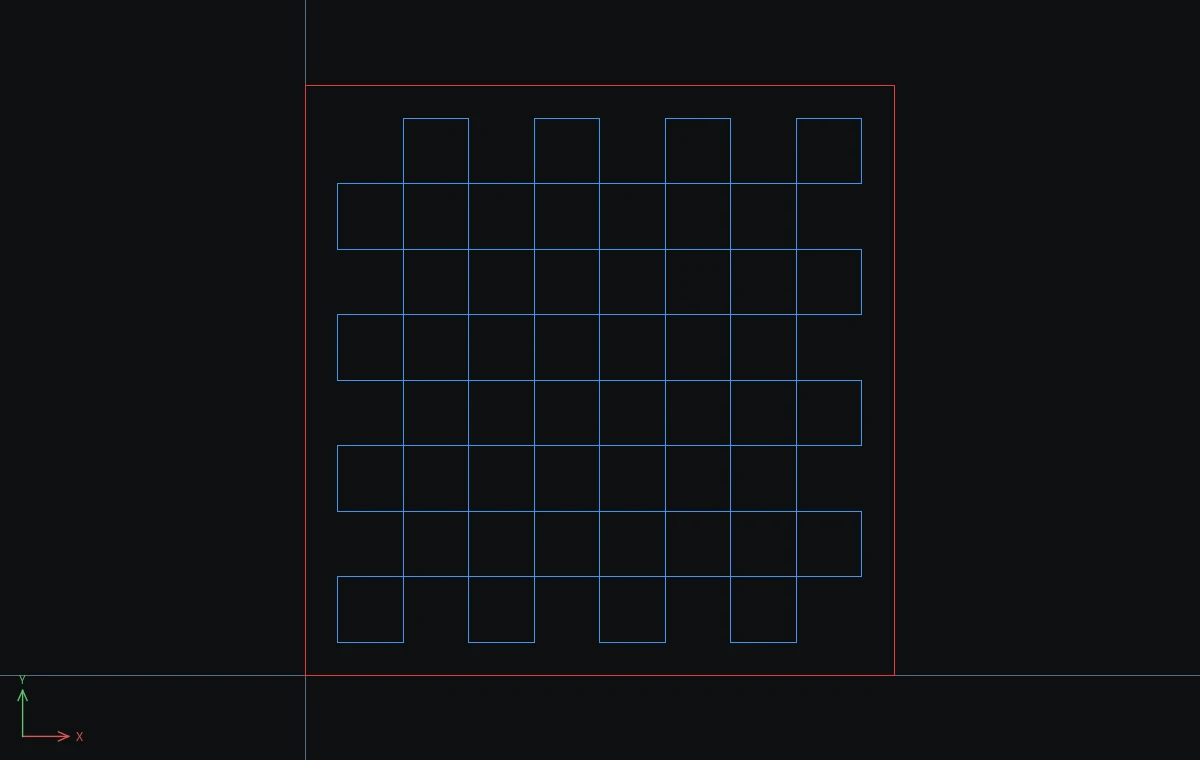
A 180 mm plywood checkers board. The laser cuts the outline and engraves the 32 dark squares. Put each job on its own layer, then use the Layer Manager to check the cut path on its own.
- Board:
REC,0,0,@180,180, Esc. Click it and typeCHPROP layer=CUT color=#FF3030. The new CUT layer appears in the Layer box. - Dark squares:
REC10,10@20,20, Esc, andREC30,30@20,20, Esc. - Drag a window around both squares and type
ARRAYRECT 4 40 0. Drag a window around the 8 squares (from 5,5 to 175,55) and typeARRAYRECT 4 0 40. That makes 32 squares. - Type
QSELECT rect 0. It selects the 32 squares that are still on layer 0. Then typeCHPROP layer=ENGRAVE color=#3399FF. - Type
LAto open the Layer Manager and untick Vis for ENGRAVE. Only the cut path is left. TypeLAYERSTATE SAVE cutcheck. The result readsLAYERSTATE: saved 'cutcheck' - 1 off, 0 frozen, 0 locked. - Tick ENGRAVE back on. From now on,
LAYERSTATE RESTORE cutcheckgives you the cut-only view in one command.
Challenge: Add a layer called SCORE for a light line around the playing area with REC 8,8 @164,164 and CHPROP layer=SCORE color=#00C000.