
What it does
The Design Explorer on the left shows everything in the part in the order it was built. Use it to select, edit, hide/show, and roll back the history.
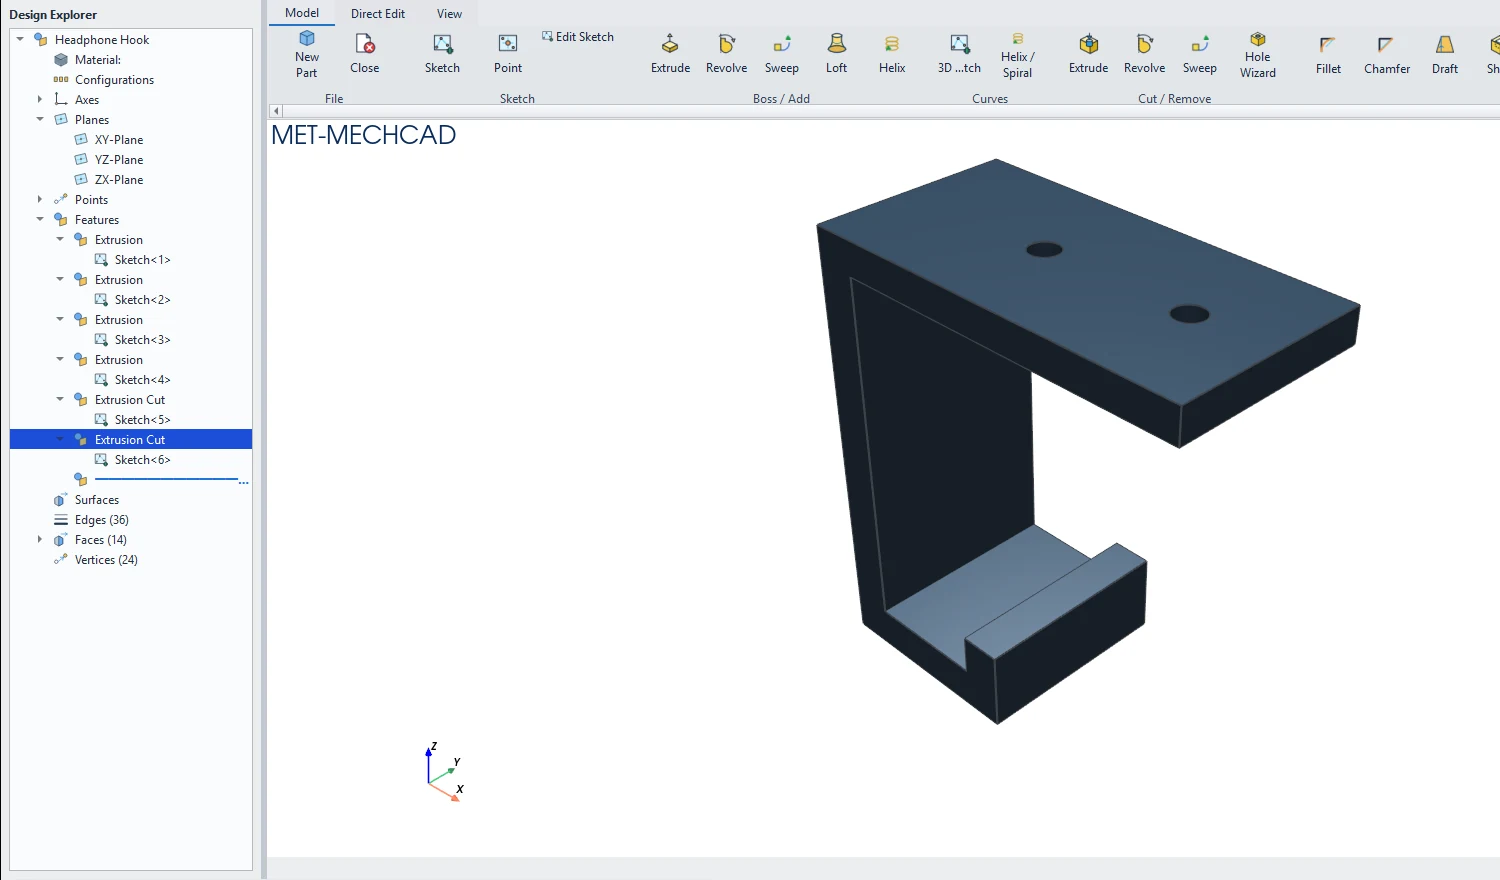
Nodes in the tree
| Node | Description |
|---|---|
| Part name | The root of the tree |
| Material: | The material. Double-click to choose a material. |
| Configurations | Part configurations |
| Axes | X/Y/Z axes and reference axes Axis |
| Planes | XY-, YZ-, ZX-Plane and reference planes Plane |
| Points | Origin and Center of Mass |
| Features | Features in order, with each feature's child sketch and the blue Rollback bar |
| Surfaces / Edges (n) / Faces (n) / Vertices (n) | Lists of surfaces, edges, faces and points (● marks a face with its own colour) |
Double-click
- Plane › creates a new sketch on that plane
- Feature › opens the feature edit box (Feature Parameters)
- Sketch › edits the sketch
- Material › opens the material menu
Right-click menu
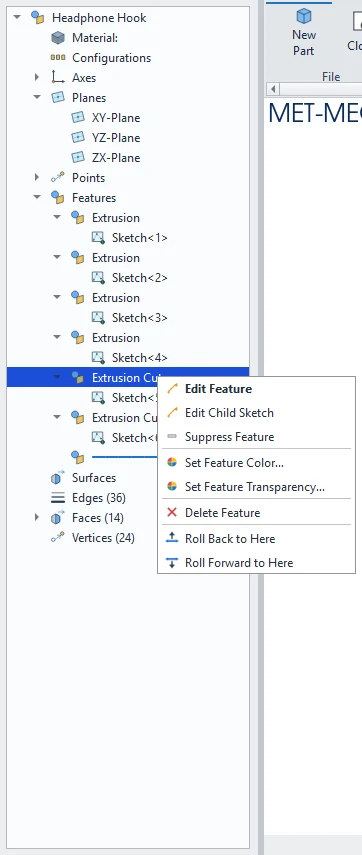
| Menu | Applies to | Description |
|---|---|---|
| Edit Feature | Feature | Edits the feature values (the main command). |
| Edit Child Sketch | Feature | Edits the sketch used to create the feature. |
| Suppress / Unsuppress Feature | Feature | Turns calculation off/on temporarily (the name then starts with "(Suppressed)"). |
| Set Feature Color… / Set Feature Transparency… | Feature | Sets the colour / transparency of that feature only. |
| Delete Feature | Feature | Deletes the feature (the sketch remains). |
| Roll Back to Here / Roll Forward to Here | Feature | Moves the Rollback bar. See Rollback and Regenerate. |
| Edit Sketch / Suppress Sketch / Delete Sketch | Sketch | Manages the sketch (deleting a sketch also deletes the features that use it). |
| New Sketch on this face | Face | Creates a sketch on the face. |
| Edit Plane |
Plane | Manages reference planes. |
| Show / Hide | Planes, Axes, Points | Shows/hides reference objects. |
Note: You can rename a feature in the Label field of the Extrude, Revolve and Loft boxes.
Try it: Under-desk headphone hook
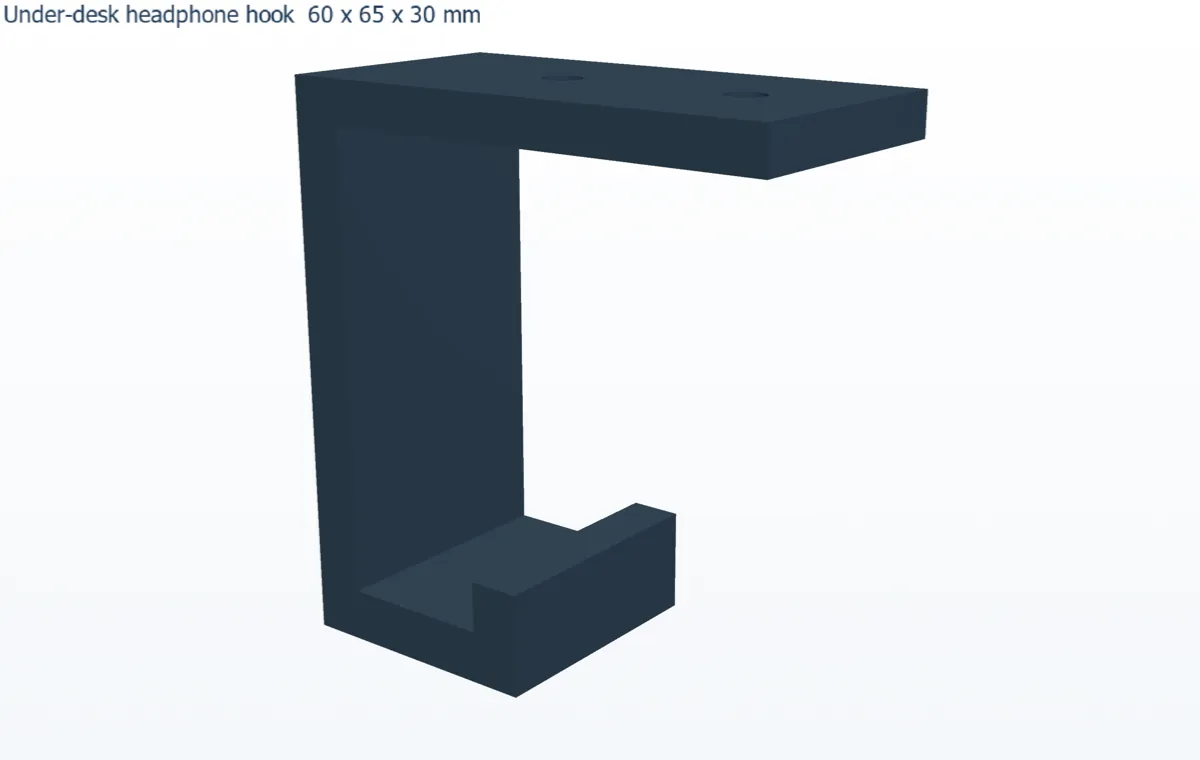
Screw this hook under the edge of your desk and your headphones are always within reach. Building it in three features gives you a small tree to practise suppress, edit and rollback on.
- Start a sketch on the ZX plane. Press L, click the origin and type these segments (length, Tab, angle, Enter): 30 / 0°, 12 / 90°, 6 / 180°, 6 / 270°, 18 / 180°, 54 / 90°, 54 / 0°, 5 / 90°, 60 / 180°. Click the origin to close the J shape.
- Finish Sketch, then Extrude with Type Mid Plane and Depth 30. In Label, type
Hook bodyand click OK. - Right-click the top face of the 60 mm top plate and choose New Sketch on this face. Draw two circles of Ø4.5 on the centre line, 25 and 48 mm from the back face. Finish Sketch, then Cut / Remove › Extrude with Through All and label it
Screw holes. - Click Fillet, Radius 2, and click the two top edges of the small front lip, then Done.
- Now use the tree: right-click Fillet 1 › Suppress Feature (it shows "(Suppressed)"), then Unsuppress Feature.
- Right-click Hook body › Edit Child Sketch, double-click the 54 dimension of the vertical arm and change it to 74 for a thicker headband. Finish Sketch: the holes and fillets follow.
- Right-click Screw holes › Roll Back to Here to see the part without its holes, then Roll Forward to Here.
Challenge: Double-click the Material: node and pick POM Black, then check the new mass in Part Properties.