
What it does
This page explains the parts of the main window. Every workbench (Part Design, Assembly, Drawing, CAM, Automation) uses the same layout.
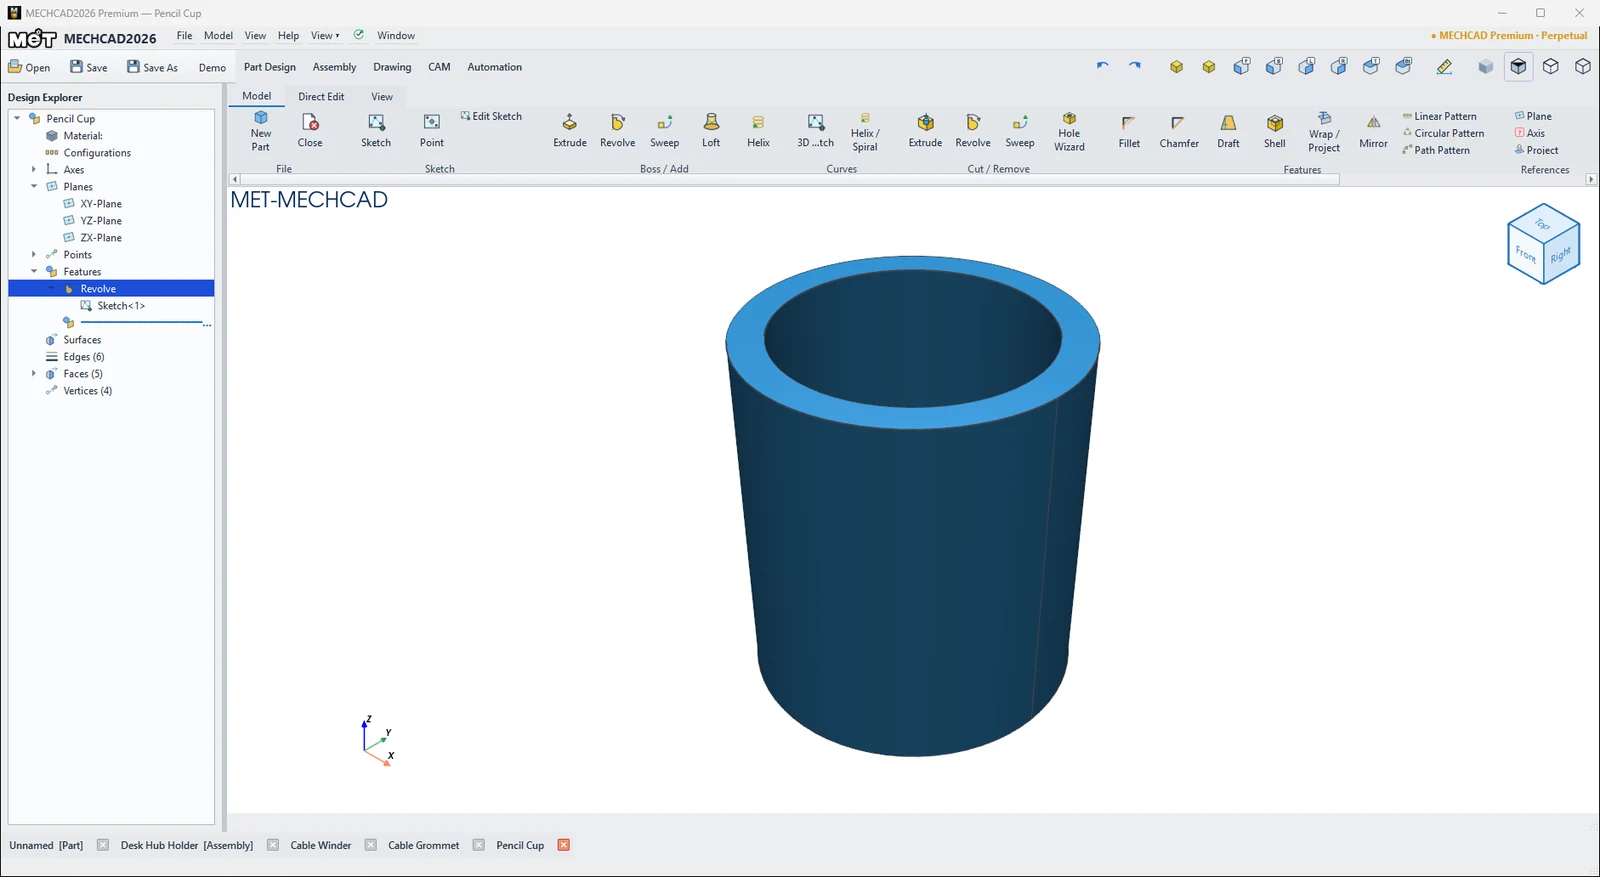
| Part | Location | Purpose |
|---|---|---|
| Logo and menu bar | Top | The menus File, Model, View, Help, View ▾, Rebuild, Window. See Main menus. |
| Edition badge | Top right | Shows the edition and licence term. Click it to open the Welcome window. |
| Open / Save / Save As / Demo | Second row, left | File commands for the document on screen |
| Workbench tabs | Second row | Part Design, Assembly, Drawing, CAM, Automation |
| Shared view buttons | Second row, right | Undo/Redo, Zoom to fit, standard views, Measure, display modes. See Standard views and the View Cube. |
| Search / Manual / Report Bug | Second row, far right | The Search tools… (F3) box, the 📖 Manual button (online manual) and 🐞 Report Bug. See Report a Bug. |
| Ribbon | Below the tabs | The workbench commands, divided into sub-tabs and groups. See Ribbon and Command Search. |
| Design Explorer | Left | The part tree: planes, features, sketches, faces. See Design Explorer. |
| 3D view | Center | The work area, with the View Cube at the top right and the XYZ axes at the bottom left |
| Document bar | Bottom | List of all open documents. Click to switch, click ✕ to close. |
| Status bar | Bottom | Messages that guide the next step of the active command |


Working with several documents
- Opening a new file (Open / double-click in Explorer) opens it in a new tab. If the file is already open, the program switches to that tab.
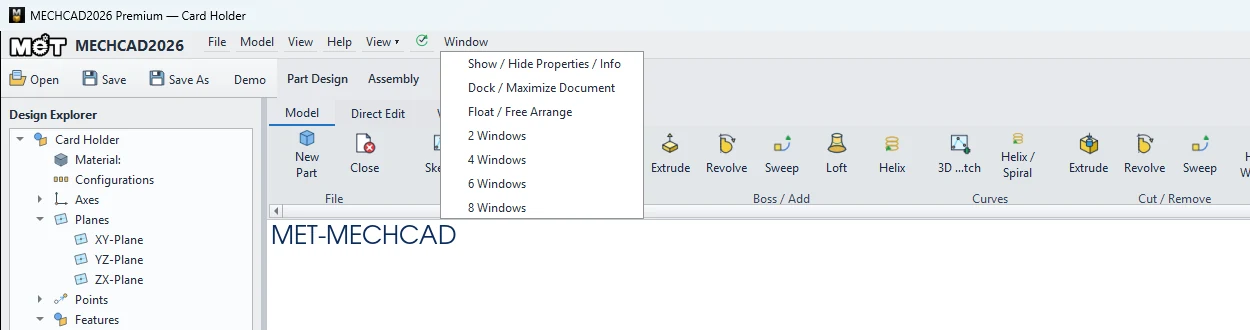
- Right-click a document tab for Dock / Maximize Document, Float / Free Arrange, 2 / 4 / 6 / 8 Windows or Close Document.
- The Window menu has the same commands, plus Show / Hide Properties / Info.
Note: If you close a document that has unsaved changes, the program asks Save changes to …?. Choose Save, Discard or Cancel.
Small screens and large text
The main window works on a 1024 px wide screen and with Windows text size set to 125–175 %.
- Ribbon wider than the window: ‹ / › arrows appear at the left and right edges of the ribbon. Click to scroll, hold to keep scrolling, or turn the mouse wheel over the ribbon to scroll sideways. The » button at the far right lists every command that is not fully on screen, grouped by ribbon group. See Ribbon and Command Search.
- Narrow workbench bar: the Search tools… (F3) box gets shorter and the Manual / Report Bug buttons show only their 📖 / 🐞 icons, so the window never gets wider than the screen.
Floating windows
Floating windows and boxes (for example the feature parameter box or the More colors picker) all behave the same way.
- Draggable: drag them by the box header (or the window title bar).
- Kept on screen: the program pulls a box back on screen when it opens, moves, resizes, or when the screen or scaling changes. Boxes that float over the 3D view stay inside the view, so the title bar can always be grabbed.
- Fits the screen: if the content is taller than the screen, the body scrolls while the OK / Cancel buttons stay visible at the bottom.
- Remembers its place: the position you drag a window to is remembered per window type and used the next time it opens.
Try it: Webcam privacy cover, two documents side by side
A thin frame with a sliding shutter for your laptop camera. It is two parts, which lets you practise the document bar and window layouts.
- Part 1, frame: sketch on XY a rectangle 40 × 14, Extrude 2 mm. On the top face, draw a window 8 × 8, 16 mm from the left edge and 3 mm from the front edge, and cut it Through All. On the top face again, draw two strips 40 × 2 along the long edges and Extrude them 1.5 mm: these are the rails. Save as
cover-frame.metprt. - Part 2, shutter: press Ctrl+N. Sketch a rectangle 18 × 9.6 and Extrude 1.2 mm. On its top face, add a 4 × 3.6 knob and Extrude it 1.2 mm. Save as
cover-slider.metprt. - Look at the document bar at the bottom: both parts are listed. Click a name to switch.
- Right-click a document tab › 2 Windows: both parts are shown side by side.
- Choose Window › Show / Hide Properties / Info to make more room, and read the status bar while you draw: it tells you the next click.
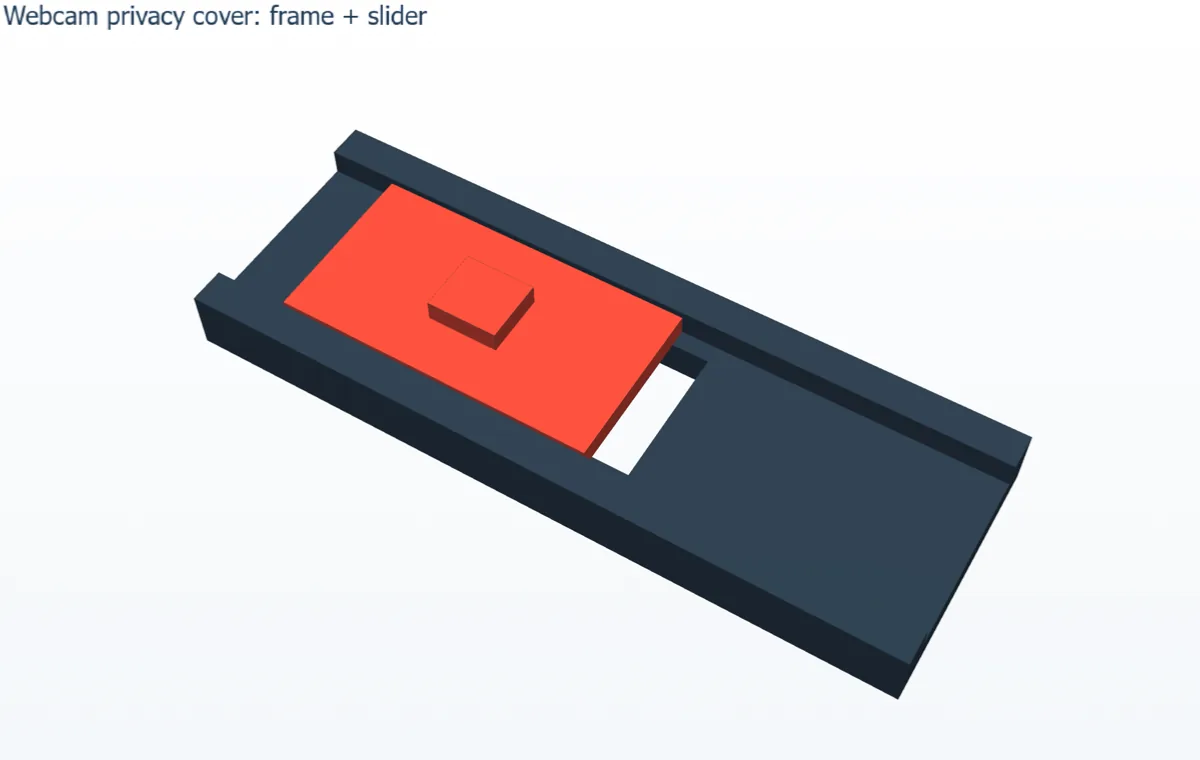
Challenge: Open the Assembly tab, insert both parts and slide the shutter between the rails.