
What it does
The ribbon shows the commands of the open workbench, divided into sub-tabs and groups. Part Design has three tabs: Model, Direct Edit and View. If the window is narrow, buttons shrink to icons only (hover to see the name).



| Tab › Group | Commands |
|---|---|
| Model › File | New Part, Close |
| Model › Sketch | Sketch, Point, Edit Sketch |
| Model › Boss / Add | Extrude, Revolve, Sweep, Loft, Helix |
| Model › Curves | 3D Sketch, Helix / Spiral |
| Model › Cut / Remove | Extrude, Revolve, Sweep, Hole Wizard |
| Model › Features | Fillet, Chamfer, Draft, Shell, Wrap / Project, Mirror, Linear / Circular / Path Pattern |
| Model › References | Plane, Axis, Project, Parameters (see Parameters) |
| Model › Regenerate | Regen, Roll Back, Roll Fwd, Roll to End |
| Model › Render | Realistic Render, Save Render |
| Direct Edit › Edit | Undo, Redo, Suppress, Delete |
| Direct Edit › Solid | Move Face, Simplify, Scale, Union / Add, Subtract, Intersect |
| Direct Edit › Create | Text, Picture, Recognize Features, Gear, Feed Screw |
| View › Orientation | Fit, Iso, Front, Back, Left, Right, Top, Bottom, Rot ↺, Rot ↻ |
| View › Projection | Orthographic, Perspective |
| View › Appearance | Part Color, Material, Opacity, Shadows, Ambient Occl., Ground Reflection |
| View › Inspect | Measure, XY, YZ, ZX, Rebuild |
When the ribbon is wider than the window
On a small screen (for example 1024 px wide), or with Windows text size set to 125–175 %, the right-hand groups of the ribbon may not fit in the window. Use these to reach the rest of the commands. They work on the Part Design, Sketch, Assembly, Drawing and Automation ribbons.
| Button / action | Result |
|---|---|
| ‹ left edge / › right edge | Scrolls the ribbon left or right. Hold to keep scrolling. The arrow turns grey at the end. |
| Mouse wheel over the ribbon | Scrolls the ribbon left or right |
| » far right | A menu of every command that is not fully on screen, with a heading for each ribbon group. Click a command to run it. (When everything fits, it shows Every command is on screen.) |
The arrows and the » button appear only while the ribbon is wider than the window, and they never cover a command button. In a narrow window the Search tools… (F3) box on the workbench bar also gets shorter, and the Manual / Report Bug buttons show only their icons.
Command Search (F3)
Find a command by name instead of looking for its button.
- Press F3, or click the Search tools… (F3) box on the right of the workbench bar.
- Type a command name, such as extrude, bevel or scale. Synonyms work too (for example bevel = Chamfer, move = Move Face, resize = Scale). Use the up and down arrow keys to pick a result.
- Press Enter to be taken to that button (the program switches workbench and tab, scrolls the ribbon and flashes a blue outline around the button), or press Ctrl+Enter to run the command at once.
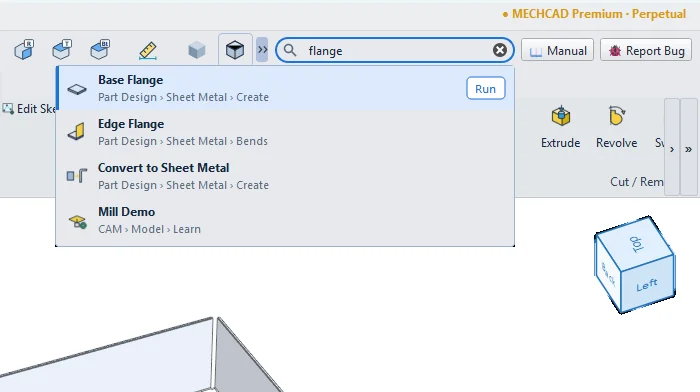
Note: Commands that cannot be used in the current state (for example Fillet before there is a part) are shown in grey.
Try it: Desk cable grommet, found with F3
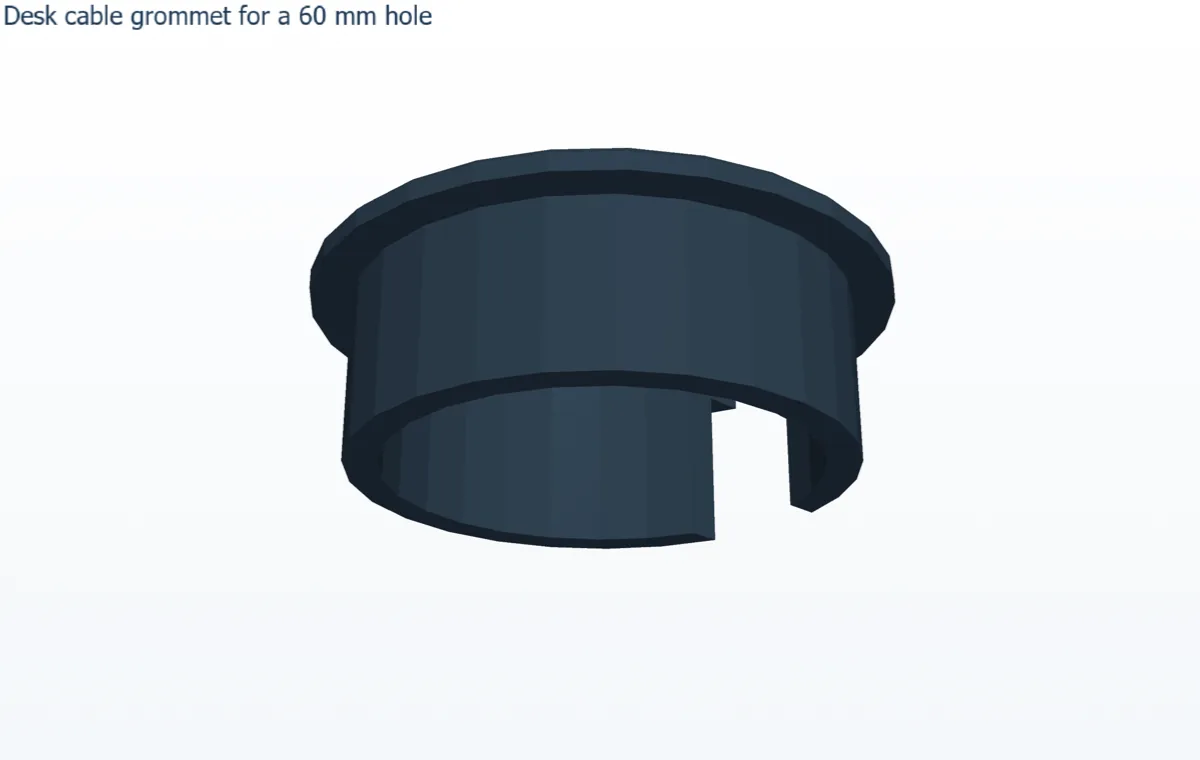
A grommet for a Ø60 mm desk hole, with a side slot so the cables can come out. Run every command from F3 instead of hunting for buttons.
- Start a sketch on the ZX plane (X right, Z up). Press L, click a point on the X axis and draw: 4 / 0°, 20 / 90°, 5 / 0°, 3 / 90°, 9 / 180°, then click the start point to close it.
- Press D and set the distance from the origin to the start point to 26 mm (the inner radius). Finish Sketch.
- Press F3, type revolve, choose Revolve Boss and press Ctrl+Enter. Choose Axis Z, Angle 360 and click OK.
- Press F3, type bevel, press Ctrl+Enter: Chamfer opens. Set Distance 0.8 and click the top outer edge of the flange, then Done.
- Right-click the top face of the flange › New Sketch on this face. Draw a rectangle 16 × 14 across the ring wall on one side.
- Finish Sketch, press F3, type extrude cut, press Ctrl+Enter and choose Through All. You now have the cable slot.
Challenge: Press F3 before you make any part and type fillet: the command is grey because there is no body yet.